Zigbee devices

I have had some Xbee radios for some time but not got around to doing anything with them.

2017-10-21 11.50.25

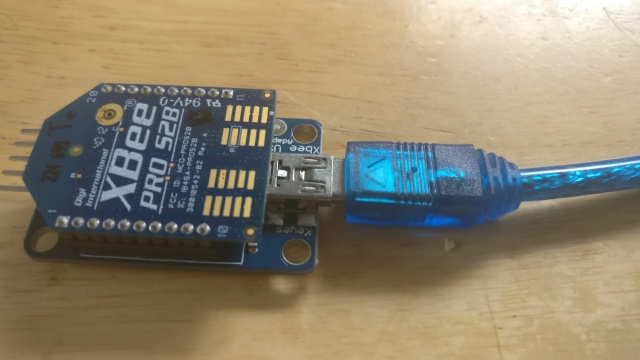
I have three Xbee radios. They are all Series 2 Pro, S2B devices, with PCB antennas. Series 2 are harder to configure than Series 1, but run a full Zigbee implementation including the Zigbee API.

The Pro devices have longer range than the standard ones but use more power. The ones with the PCB antennas are the cheapest, but don’t have the range that an external antenna gives.

There are newer S2C devices that support on-board programming and the Home Automation profile. They are a bit more expensive. The S2B radios I have cost about £11 on ebay.

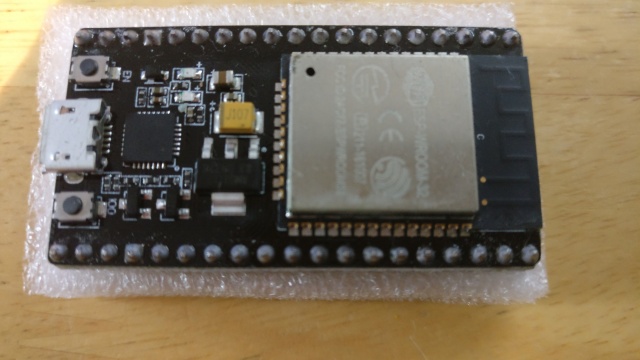
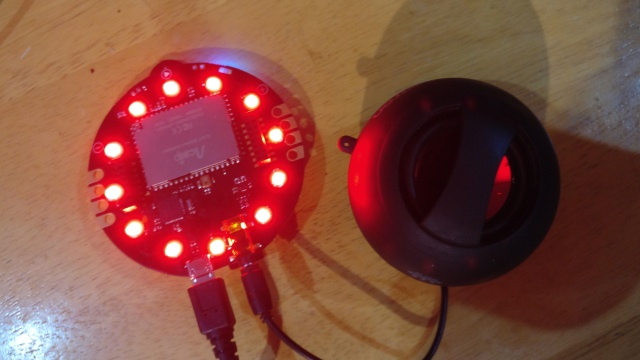
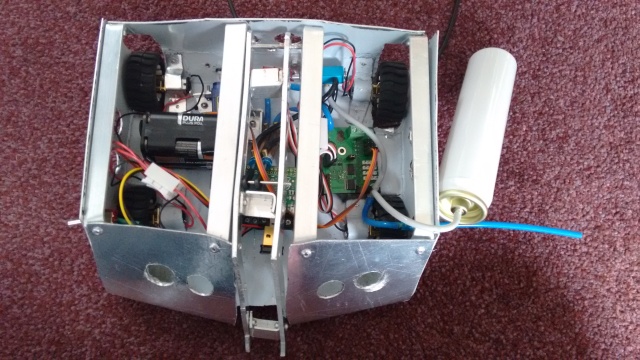
The device in the picture is mounted on a cheap USB adapter. That allows it to be programmed by the Digi XCTU software or via AT commands from a serial connection.

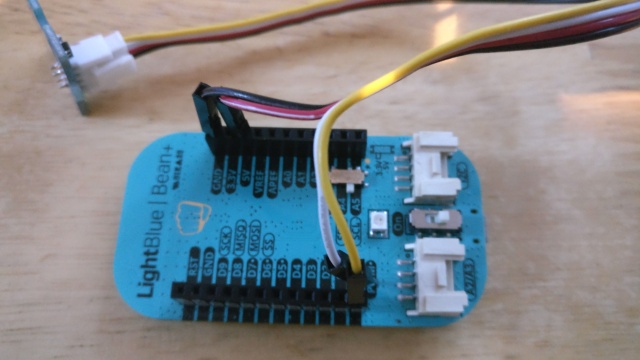
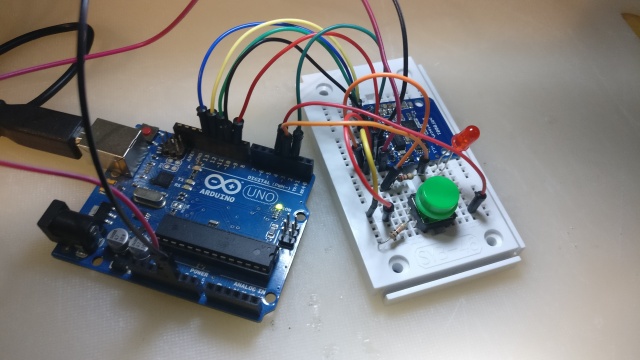
I also have a couple of Arduino shields

2017-10-21 11.51.26

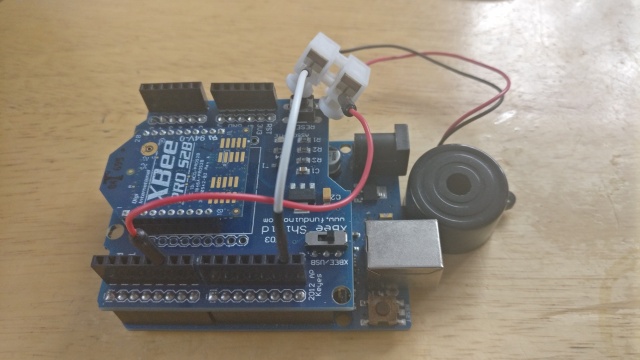
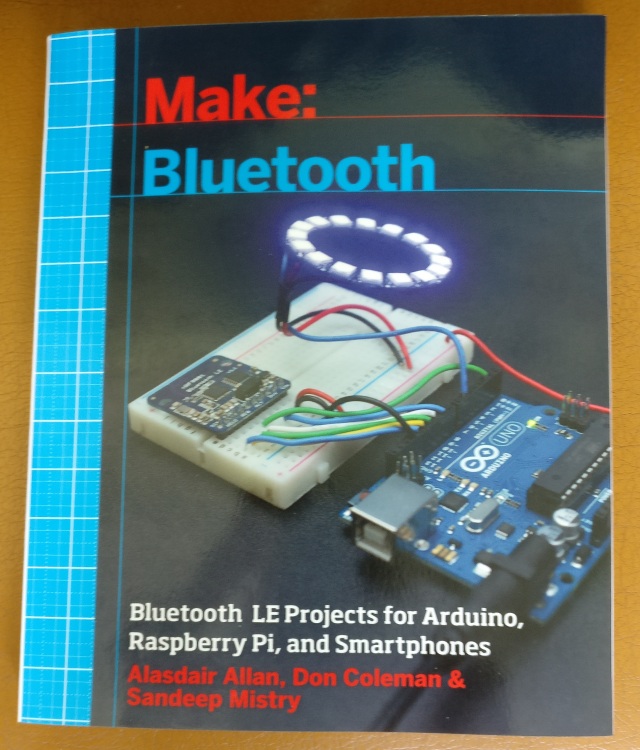
The picture shows a buzzer connected to the Arduino, as I was trying out the projects from this book:

wireless sensor networks

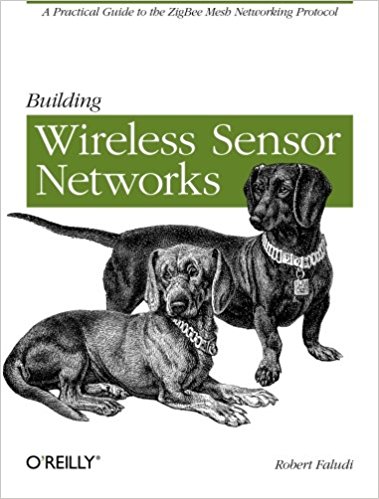
The book is rather old but seems to be the best for practical projects with Series 2 radios, as well as having a lot of information on the AT commands supported and the Zigbee API.

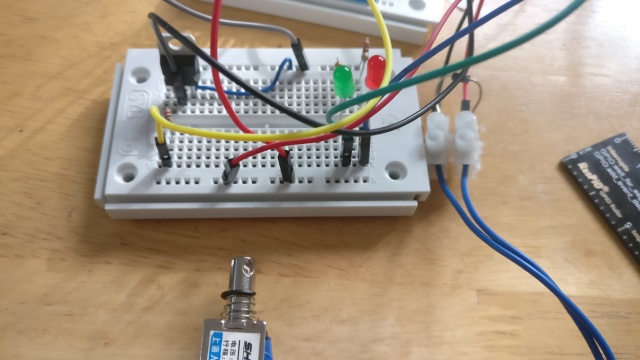
I had not realised that the Xbee modules allowed the creation of sensors and actuators without a separate microcontroller such as an Arduino.

I have a couple of breadboard adapters for the Xbee radios on order, so I can try the sensor and actuator projects from the book that don’t require an Arduino.

Zigbee networks are mesh networks but rather complex. They have a coordinator node and router and end point nodes. Coordinators and routers are usually mains powered, but end points can be battery powered and made to sleep most of the time.

Configuring Xbees is complex as there are lots of firmware options, and lots of routing, security  and network options.

The firmware comes in two main options for each of the types of nodes. There is an AT variant that supports AT commands and transparent mode, and an API variant that supports a structured data protocol.

The firmware is uploaded and configured with the Digi XCTU software.

On top of the API lots of profiles are built, including the Smart Energy Profile and the Home Automation Profile. The profiles support different clusters, which I think are a bit like BLE services. The profiles have different security and encryption requirements. It is all very complex.

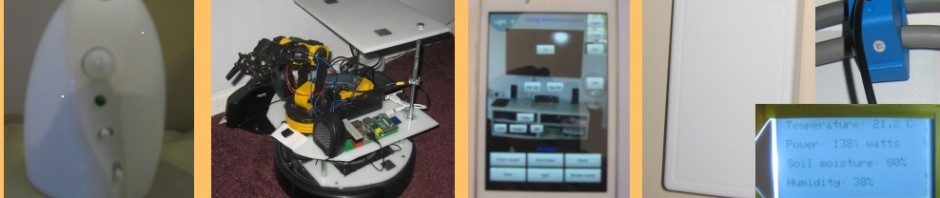
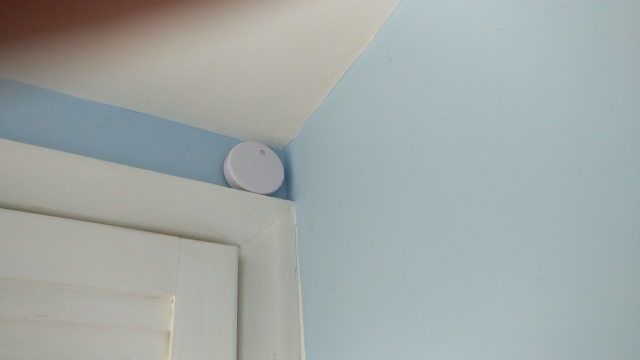
I have several commercial Zigbee devices in my house, including my Scottish Power smart meter:

2017-10-21 12.34.50

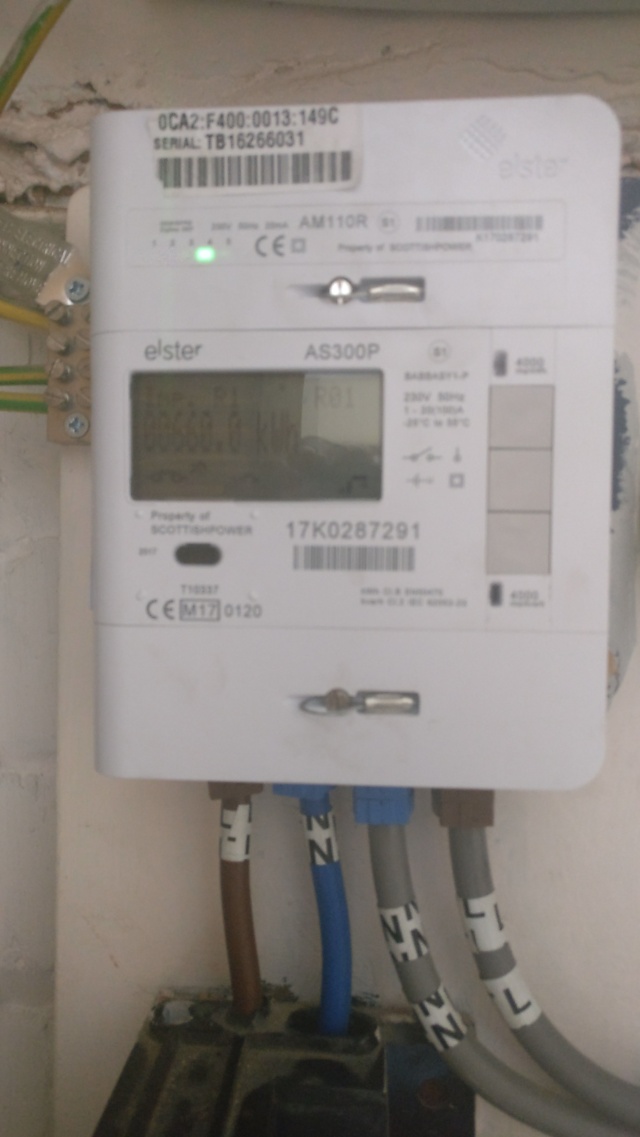
and its display device:

2017-10-21 12.35.19.jpg

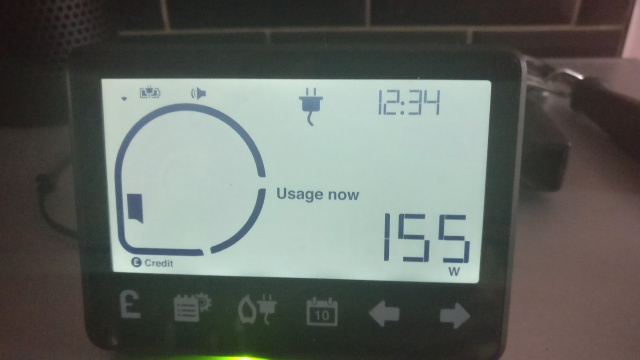
I believe these devices support the Zigbee Smart Energy Profile. That profile has high security requirements and I don’t think it would be possible to get a home made device to connect to that network. I suspect that the smart meter is a coordinator and the display device is an end device.

The Smart Energy profile should be able to support devices obtaining price information from the meter so that they can switch on or off depending on the price of electricity. For example your thermostat could cool your house more when electricity was cheap. Or your EV car charger could switch on when electricity was cheap and abundant. Or perhaps it could provide energy to the grid when electricity was expensive and in demand. It is a pity, but I don’t think I will be able to do any of this with DIY devices. Any devices doing that would need to be certified and installed with the appropriate keys.

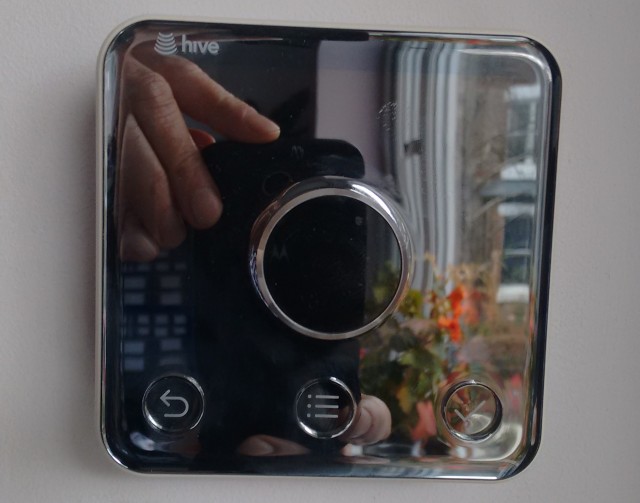
The other commercial Zigbee devices that I have are a Hive thermostat:

2016-04-07 10.38.14

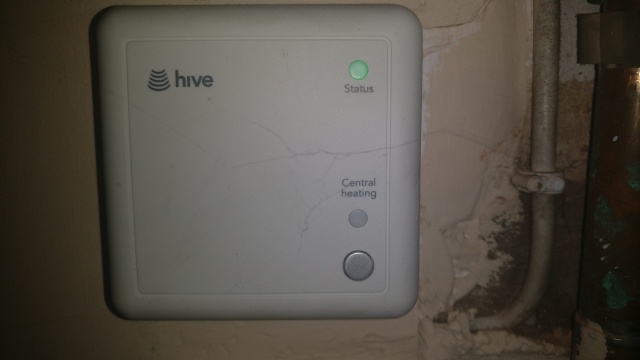
and its boiler controller:

2017-10-21 12.50.01

and its Internet hub:

2017-10-21-12-52-09.jpg

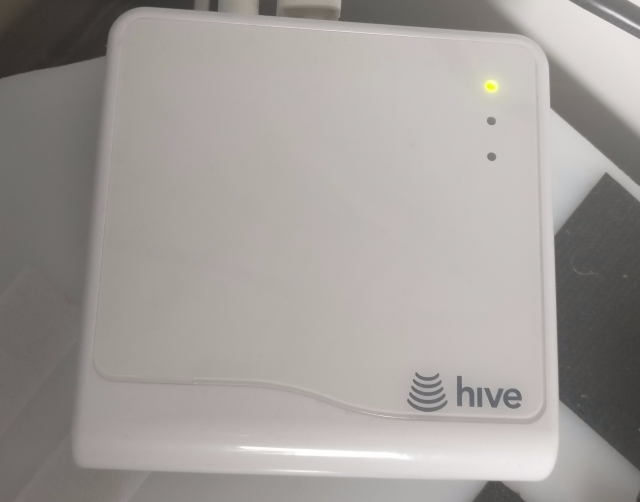
I am not sure what profile or profiles the Hive devices support. They may support the Home Automation profile or the Smart Energy Profile or possibly both. There is little information available on them. I suspect that the boiler is the coordinator for the network, the thermostat is an end device and the hub is a router or an end device.

There are other devices in the Hive range such as motion sensors, and contact sensors. They do support the Home Automation profile, as people have them working with a Smartthings Zigbee hub.

It seems unlikely that I could get a home made device to connect to the Hive heating Zigbee network. It would be nice to control the receiver directly rather than via the hub.

It would make sense that the Hive thermostat supported the Smart Energy profile so it could look at the price of electricity, but I don’t think anything like that has been rolled yet.

It is a pity that I have these Zigbee networks that I cannot connect to.

So, it is worth me setting up my own Zigbee network with home made wireless sensors? I suspect not, as it is all too complex involving coordinators, end devices and possibly routers.

If I had a Smartthings hub, which already works as a coordinator for Zigbee HA profile end devices, it might be worth building or buying Zigbee sensors or actuators, but currently I don’t want to buy yet another hub device.

Phones do not currently support Zigbee but that could change if Google’s Thread ever supports Zigbee and Android phones support Thread.

As Thread is based on 6Lowpan which uses the same radio standard as Zigbee, support for Zigbee by Thread is possible, and there have been reports that it might be coming. Phones would have to include radios that support IEEE 802.15.4 radios, but that will presumably come if and when they support Thread.

It looks like the Amazon Echo Plus with a hub supports Zigbee. I am more likely to get one of those, than a Smarttthings hub, so that could change whether it is worthwhile me building or buying any Zigbee Home Automation profile devices.

I currently have an Echo Show on order to replace the Echo in my kitchen. That does not support the hub functionality. Where would I put the Echo Plus? The Living room is a possibility, but I have a Google Home in the living room. Decisions, decisions.

Posted in Home automation | Tagged , | Leave a comment

Bluetooth Low Energy devices

I have quite a collection of Bluetooth Low Energy devices, so I thought I ought to integrate them with my home automation system.

This is a Ruuvi Tag that I bought on Kickstarter. It is acting as a temperature, pressure, and humidity sensor in my bathroom.

2017-10-10 13.19.16

The Ruuvi Tag works by default as an Eddystone weather station beacon and is part of Google’s implementation of the Physical web, which means that it can show a web page with the sensor values when you are close to the beacon.

You can also, using the same weather station firmware, put the device in a mode that sends the sensor values in binary data rather than as a URL with the data encoded in it. This is more useful for me as there is then a node.js package (node-ruuvitag) and a Node-RED node (RuuviTag node) that can be used to read the data and integrate with my home automation system by send it to an MQTT broker.  In this raw mode all the sensor data is encoded in the advertising data in a proprietary format, so there is no need to connect to the device to get the data. The device can also be programmed in Javascript using the Espruino Web IDE, if you flash the appropriate firmware.

In general, I want to link all my BLE devices to MQTT. There are some generic BLE beacon to MQTT projects, but I don’t believe they will deal with all my devices, particularly the ones that aren’t beacons, so I am integrating them one at a time. Even the ones that are beacons such as the Ruuvi tag, use proprietary data formats.

For the Ruuvi Tag I used the Node-RED node to forward the data to MQTT.

The Ruuvi tags are quite a nice way  of getting temperature, humidity and pressure data from the rooms in my house. They are low energy and run off coin batteries, and have nice packaging. I might get some more, but they don’t do the other things that I want room sensors to do, such as light level and human presence detection.

With Raspberry Pis now having BLE support, it is easy to use them as a central device to collect data from a collection of BLE peripheral devices using Node-RED.

Another BLE device that I got from Kickstarter is the Tepron Move blind controller:

move
I have just installed this but am having problems calibrating it, so Tepron are sending me a replacement device.

It uses Qualcomm CSRMesh technology, which creates a mesh of BLE devices.

I currently operate the Move device using the provided Android App, but would like to integrate it with my home automation system, so I can open and close it at dusk and dawn or via voice commands from Alexa or Google home.

Tepron don’t seem to have implemented their developer tools yet, but there are some CSRMesh CLI tools which I think can be made to control it. Someone has used them to integrate it with OpenHAB.

Bluetooth Low Energy has a simple model, but one that it a lot different to classic Bluetooth. BLE peripherals send out advertising data at regular (configurable) intervals. A central BLE device can scan for the advertising data, connect to the device and read and write characteristics to get data from the device or control it. Characteristics are collected into services. While connected to a device a central client can also receive notifications when characteristics changes.

The Ruuvi tag does not use characteristics as it encodes its sensor data in the advertisement data, or in the Eddystone URL. The main characteristic that the MOVE device uses, after calibration, is the required position of the blind. I think this is a byte value with 0 meaning closed and 255 meaning open.

There are several Android apps that are useful for investigating BLE devices, particularly LightBlue Explorer, and nRF Connect.

Yet another Kickstarter BLE device that I have is the LightBlue Bean+, which is programmable over the air by the Arduino IDE:

2017-10-10 18.06.17

The LightBlue Bean+ device supports Grove sensors, so it could be used to implement BLE sensors.

I had problems with both the Android app for the Bean+, and the node.js based CLI running on a Raspberry Pi. They were both very unreliable. But the CLI runs fins on my Ubuntu desktop machine.

Another BLE device that a lot of UK schoolchildren (and I) have is the BBC Micro:Bit.

2017-10-10 14.16.53

The Micro:Bit has some non-standard features including pairing and encryption. To make it work with standard BLE software such as the noble node.js package, I am using firmware that removes the non-standard security features, that comes with the node-bbc-microbit package written by Sandeep Mistry. Sandeep has written a lot of the open source BLE software including the node.js noble package, and Arduino libraries for various devices.

I also have a Pebble watch that I believe uses or can use BLE, but I have not seen it show up in any of the BLE scans that I have done. I think my Pebble might be using classic Bluetooth.

Devices that I have that can act as a central node to collect data from BLE peripherals are Raspberry Pi 3s, Raspberry Pi Zero Ws, my Oneplus 3T phone and my Gigabyte Ubuntu desktop.

I also have a HubPiWi Blue from Kickstarter that I can use to make an earlier Raspberry Pi Zero support Wifi and BLE.

My Google Home devices advertises a BLE service with a lot of charcteristics, but I don’t know what they do.

My Fitbit Charge2 appears as a Bonded device in nRF Connect, which I thinks means it requires pairing and implements encryption. It has a couple of services and several characteristics, but I haven’t been able to find documentation for them.

I also have a Haiku BLE Bike computer from Kickstarter, but haven’t deployed it yet.

2017-10-10 15.10.28

I have been reading a book on BLE:

book

I have ordered a couple of devices so that I can try some of the BLE projects from that book. So I have ordered a Bluefruit module for Arduino and a Parrot rolling spider drone, so I can control a drone via BLE.

2017-10-11 13.56.32

2017-10-11 13.54.48

The book has some interesting Arduino projects. Being able to program the Arduino and Bluefruit combination as a HID device opens lots of possibilities. The book’s HID project is a volume control for a mobile phone using a potentiometer  connected to an Arduino.

I have an old Fitbit Zip BLE device which I replaced with a Charge2 when the glue came unstuck and the device fell apart. But it still seems to be trying to talk to me from by box of dead equipment.

I also have an ESP32 development board, which supports BLE. The software for the ESP32, particularly for the Arduino IDE, seems a bit immature at the moment. It is possible to create a simple beacon that incorporates a sensor value in its name.

2017-10-11 13.59.37

Here is the working smart light switch from Chapter 3 of the book:

2017-10-11 19.04.31

And here is the lock example driving a solenoid st the moment as I have a lock mechanism on order:

2017-10-18 11.29.47

And here is the NeoPixel lamp from the book, using a very cheap Lamp, the Lampan, from Ikea:

2017-10-20 11.06.09

A phone app written using PhoneGap/Cordova allows you to change the colour and brightness., and switch the lamp on and off. It would be easy to add control of this via my home automation system and via Alexa and/or Google Home.

In general BLE is good for things that have associated phone apps because of the support in Android and iOS. It is good for low-powered devices. A problem with it is range. It it difficult to have one central device in my house, such as a Raspberry Pi, getting data from and controlling BLE peripherals across the house. The range of Wifi is better, but the pain with Wifi is connecting everything to the router and having them not working if the router or its Internet connection are down.

BLE mesh technology might help with the range issue. My Move blind uses the Qualcomm CSRMesh technology, but a mesh of one device is not much use. The Bluetooth Mesh standard has recently been published and Qualcomm will support that. If that standard gets a lot of support, it might solve the range issue and become a real competitor to Zigbee and Z-Wave for home automation devices.

I am going to have another look at Zigbee, as I have had some Xbee radios for a while and not done much with them. I have two commercial Zigbee networks in my house: one for my Smart meter and its associated display device, and another for my Hive thermostat and its boiler controller and Internet hub. Zigbee seems quite a reliable choice for home automation devices, but it is very complex.


Posted in Home automation | Tagged | Leave a comment

Marvin the Respeaker

2017-01-21-17-25-22

I have been playing with the Seeedstudio Respeaker Kickstarter device.

It is designed to enable you to build your own Amazon Echo or Echo Dot devices and is similar to the circuit board from an Echo Dot. The software and instructions are on github.

At the moment the instructions on using it are a bit sketchy and the software a little buggy, but it is a very nice device, and there is a lot of useful supporting software.

It runs openwrt Linux and supports Wifi (but not Bluetooth). It has an audio jack to connect to any speaker, or you can solder a speaker to it.

It has an Arduino Leonardo device that drives 12 RGB LEDS and 8 capacitive touch sensors.

And it has expansion connectors for a a Grove sensor adapter and for an optional microphone array.

It supports an SD card that can expand the Linux storage and can be used to store music.

All of the significant software and examples are in  Python.

It comes with examples to access the Amazon Alexa service, the Mycroft open source equivalent, and the Microsoft Bing speech recognition and text to speech APIs. You can also access the Google text to speech API.

It also runs the Mopidy music player and has a web front end to the Mopidy music player and a few other functions.

It runs pocketsphinx for local, offline speech recognition or to recognise keywords such as “Alexa”.

I built a speech-controlled music player and Alexa equivalent based on the examples.

I control Modipy using the python-mpd2 client software .

I called my device Marvin after Marvin the paranoid android and Marvin Minsky and added “Marvin” to the keywords that pocketsphinx recognises  to achieve that.

I can set up playlist and play them by using a spoken phrase containing the playlist name (“Marvin, play Bob Dylan”). The playlists can be tracks on the SD card or Internet radio stations. I also support spoken command like “pause”, “play”, “stop”, “next”, “previous”. And I also got it to speak Wikipedia entries like Alexa does. It uses text to speech to tell you what it is doing.

My program is in python.

It all works, but unfortunately not very well.

The microphone it not up to the standard of the one in the Amazon Dot. You would probably have to buy the expensive microphone array to get decent performance.

I am also not sure that pocketsphinx is up to the job of recognising keywords.  It does not work as well as the newer online speech recognition services like Alexa and Bing Speech API.

It is also difficult to get all the different software to access the microphone and speakers without errors.

So, I think it is a very good try at an open source copy of an Amazon Dot, but both the hardware and software needs improvement.  It is extremely hard to be cost-competitive with an Amazon Dot.

Posted in Electronics, gadgets, Uncategorized | Tagged , , | Leave a comment

Social robot (1)

webcam-toy-photo4

I am working on a social robot to wander around the house, find people, and annoy them.

Some of its features are:

  • Autonomous wandering, looking for humans
  • Face recognition and face tracking
  • Recognising people by name
  • Following people by tracking their faces
  • Speech synthesis
  • Speech recognition
  • Home automation
  • Google Now integration

It is a bit like social robots such as Buddy, Zenbo and Aido, but cheaper, and smaller.

I am using this base, which is available from various suppliers, and comes with two motors.

The version I bought came with this motor shield, this ESP8266 module. There are lots of ESP8266 boards on ebay, but you have to be careful to get one that fits the motor shield. It is now a bit old.

The base is powered by 2 86250 3.7v rechargeable Lithium Ion batteries. Battery packs for these are available cheaply on ebay and elsewhere.

webcam-toy-photo5

I  reprogrammed the firmware in the ESP8266 using the Arduino IDE. My version connects to my Wifi access point and uses MQTT messages to drive the robot, get sensor values etc.

I added an HC-SR04 ping sensor to stop the robot bumping into things. As the ESP8266 has 3.3v logic, I used an HC-SR04 that worked with 3.3v. They are slightly rarer and more expensive than the 5v only ones.

I have used a couple of different camera modules, including one based on the OpenMV. The one in the picture is using an Android phone, on a pan-and-tilt phone holder. Using an Android phone rather than the OpenMV allows me to provide a lot more features.

I am currently just using the tilt function with a single HS-422 servo. The HC-SR04 ultrasonic sensor and the servo are driven by the ESP8266 motor shield.

The Android App that I have written uses:

I am using JavaCV rather than the OpenCV java interface, as JavaCV seems to be simpler and more complete for this application. (I tried both and a combination of them).

On the phone display, I either show a robot face or a camera preview from the front camera. The app recognises faces and sends MQTT commands to the base to keep the face in the middle of the screen. If the face it too small, the robot moves forward; if it is too big it moves back. If it is on the left of the screen, the robot turns right; if on the right, it turns left. It is is high on the screen, the camera pans up; if low, it pans down. In this way, the robot follows and tracks the person.

When the robot first recognises a face, it asks the person for their name using Google speech recognition. It then goes into a short training session. When it has enough data, it attempts to predict who a new person is. This works reasonably well, but is a bit dependent on lighting. Google speech recognition is a little slow.

If you touch the phone screen, you get a small pop-up menu of options. One option is to switch between face and camera mode. The others are different varieties of speech commands:

  • Phone commands
  • Robot commands
  • Home automation commands

The phone commands are the Google Now ones that you get by touching the microphone on Android phones. This includes opening apps, asking questions, setting reminders, playing music, etc.

Robots command are ones I have implemented and include driving the robot, and managing the face recognition data. For examples, you can list the recognised people, delete and rename people. The data is kept in an external directory in the phone memory.

Home automation commands are sent to my home automation system via MQTT. So I can switch the lights, television, heating etc. on and off.

I might add Alexa commands to this.

I think my social robot can do most of the things that the commercial versions can do,  but it is not done quite as smoothly as the videos for those products suggest they work.

I could quite easily add extra function like taking pictures or videos and uploading them to Facebook or Youtube.

It doesn’t have the story telling capability or game playing or education apps or recipe following of the commercial social robots, but this could be done by integrating with other apps.

The Aido has an optional video projector, which is a nice feature, but expensive.

I need to add a cliff sensor to stop the robot falling down stairs. A few more sonar sensors would help too.

It would be good to add navigation capability but that would need Lidar or a 3D camera, or perhaps a Google Tango phone.

Continuous listening for a trigger word is also possible. It currently only listens when it asks for the name of an unrecognised person, or when you touch the screen and select a speech command type.

Some animation of the face like blinking, eye movement and moving of lips when talking, would be good.

Other things I could add include motion tracking, emotion detection, object recognition, and telepresence.

I will describe the ESP8266 and Android software in separate posts.

Posted in robotics | Tagged , , | Leave a comment

Alexa

I got an Amazon Echo the day it came out in the UK, and replaced the Raspberry Pi version in my kitchen with it.

I also have an Amazon Dot on order for when in comes out in the UK in a few weeks time. I will use it as a bed-side radio.

The Amazon Echo and Alexa work very well.

I upgraded my Spotify account from Unlimited to Premium to work with Alexa. I have several reasons for wanting to do that, so it was about time.

Spotify works brilliantly with Alexa. The only thing it doesn’t do it let me specify other devices to play Spotify on. (I can do that with Spotify Connect with my Premium account).

Alexa now knows my UK location, which makes a lot of things, like weather reports work better.

Some things have stopped working: IFTTT doesn’t seem to work with UK accounts.  It used to work when my account was effectively a US one. Fitbit integration also seems to have stopped working. I am sure these things will be fixed.

The Echo worked straightaway with my Wemo Insight devices, and with my Hive thermostat. Controlling my heating with Alexa is nice.

Google calendar integration was also straightforward.

I installed ha-bridge on a Raspberry Pi which was very easy, and it has a very nice web interface. It emulates Philips Hue switches. It allows me to control my LightwaveRF devices, my EDF IAMs, and my media devices (Virgin TiVO, TV, AV Receiver) via my existing home automation software and my IR Blaster.

So I now have nearly 30 devices controlled my Alexa.

Device groups didn’t work too well for me as my existing software didn’t cope with the devices being switched simultaneously, so I set them up as virtual devices in ha-bridge instead.

I could do with much better control of my TV, so I might develop an Alexa Skill for that.

At the moment I am getting ha-bridge to talk to node-red by http, and then using MQTT to talk to my home automation software.

I plan to have an Amazon Dot in each bedroom and an Amazon Echo on each floor, so I can talk to Alexa from anywhere in the house.

I am not too sure about security. I don’t want people shouting through the letter box “Alexa, Open the Front Door”.  Luckily I haven’t fitted an IoT front door lock yet, as the ones that would work with my house are too expensive. “Alexa, disarm the alarm”,  also doesn’t work yet, as my alarm system is hard to integrate with.

Buying Amazon products with Alexa doesn’t work yet in the UK, but it probably soon will.

The Alexa phone app now works in the UK. The Alexa web site already worked. Both are useful. I am trying out using the phone app at the shops to look at my shopping list and delete items as they are bought. Alex now recognises “Add Marmite to Shopping List”, which the US version didn’t.

I could do with an Alexa skill to interrogate my home automation system. E.g. to ask for the temperature in a room, or for a breakdown of electricity usage. Or which plants need watering.

It would also be useful if Alexa could speak notifications from my home automation system, but I have a Raspberry Pi doing that at the moment.


Posted in Amazon Alexa, Home automation, Raspberry PI | Tagged , , , , , | Leave a comment

My first robot wars robot

2016-07-17 20.43.21

My grandson Elliot wanted me to build him a robot wars style robot. I thought I would try one with a flipper, as chainsaws and flame throwers seemed a bit dangerous for a child.

I have no skills in metal work or mechanics, so it was quite a challenge. I decided to base it on an existing design, as I am not skilled enough to design my own metal chassis. I chose the one that is the top hit, when you google “robot flipper“.

That design is not a robot wars robot, but an autonomous Sumo robot, but it was close enough. I copied the chassis and flipper from that robot, and used the pneumatics design, but completely changed the electronics and the mechanics.

I use these motors and wheels and a Raspberry Pi Zero with a ZeroBorg and an UltraBorg to drive the motors, servos and ultrasonic sensors. I use a Wifi dongle to communciate with it.

The robot looks very battered due to the number of battles it has been it. It is nothing to do with my poor metal working skills.

The robot would not cope well in a real battle. I did not add much reinforcement so it is not very strong. The motors have too little torque to push anything much, it is too high of the ground to flip anything, and the pneumatics are leaky. And it is too small. But it does drive around, detect obstacles and flip things over. I would quite like a full size one to drive.

It is programmed in Python.

Here is some of the insides:

2016-07-17 09.19.10

Posted in Raspberry PI, robotics | Tagged , | Leave a comment

Pebble voice control

2016-06-18 08.14.03
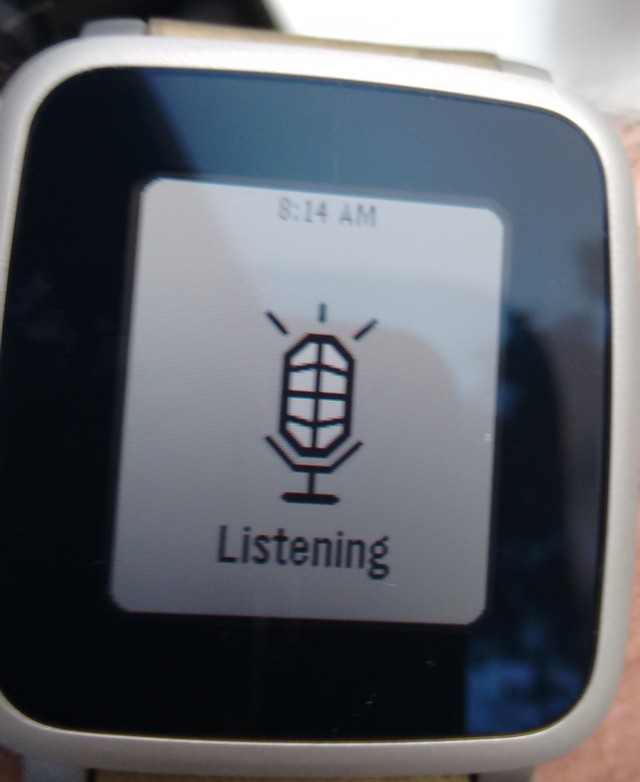
I bought a Pebble Time Steel a few weeks ago when the price dropped, and have just started looking at creating my own apps and watch faces for it.

The CloudPebble site makes it very easy to develop apps for the Pebble.

The part of the app that runs on the watch is written in C, and the part that runs on the phone is in Javascript. The app is seamlessly installed to both, and the debugging features are good.

So, to make voice control of my home automation system work, I modified a simple voice transcription app and made it send the command to node-RED and then show the command and response on the watch.

I already had a node-RED html flow that executes my house control commands and returns the reply.

Whether the app is practical is debatable. From having a watch face displayed, the sequence of actions is:

  1. Press the Select button to open the app list
  2. Scroll down to the voice control app
  3. Press Select to open the app
  4. Press Select to listen
  5. Speak the command
  6. Press select to stop listening and review the voice transcription
  7. Press Select to execute it, if it was OK, or Back (to step 5) if not
  8. Look at the reply on the watch
  9. Press the Back button to go back to the watch face

The voice transcription seems pretty good, so I don’t often have to repeat steps 5 to 7.

Here is the C program that runs on the watch:

#include <pebble.h>

static Window *s_main_window;
static TextLayer *s_output_layer;
static DictationSession *s_dictation_session;
static char s_last_text[256];
static char s_command[256];
static char s_reply[64];

/******************************* Dictation API ********************************/

static void dictation_session_callback(DictationSession *session, DictationSessionStatus status, 
                                       char *transcription, void *context) {
  if(status == DictationSessionStatusSuccess) {
    strncpy(s_command, transcription, sizeof (s_command));
    
    DictionaryIterator* dictionaryIterator = NULL;
    app_message_outbox_begin (&dictionaryIterator);
    dict_write_cstring (dictionaryIterator, MESSAGE_KEY_COMMAND, transcription);
    dict_write_end (dictionaryIterator);
    app_message_outbox_send();
  } else {
    // Display the reason for any error
    static char s_failed_buff[128];
    snprintf(s_failed_buff, sizeof(s_failed_buff), "Transcription failed.\n\nError ID:\n%d", (int)status);
    text_layer_set_text(s_output_layer, s_failed_buff);
  }
}

/************************************ Messaging *************************************/

static void inbox_received_callback(DictionaryIterator *iterator, void *context) {
  APP_LOG(APP_LOG_LEVEL_INFO, "Message received");
  // Read tuples for data
  Tuple *temp_tuple = dict_find(iterator, MESSAGE_KEY_REPLY);
  strncpy( s_reply, temp_tuple->value->cstring, sizeof (s_reply));
  APP_LOG(APP_LOG_LEVEL_INFO, "Reply: %s", s_reply);
  
  // Display the dictated text
  snprintf(s_last_text, sizeof(s_last_text), "Command:\n%s\nReply: %s", s_command, s_reply);
  text_layer_set_text(s_output_layer, s_last_text);
}

static void inbox_dropped_callback(AppMessageResult reason, void *context) {
  APP_LOG(APP_LOG_LEVEL_ERROR, "Message dropped");
}

static void outbox_failed_callback(DictionaryIterator *iterator, AppMessageResult reason, void *context) {
  APP_LOG(APP_LOG_LEVEL_ERROR, "Outbox send failed");
}

static void outbox_sent_callback(DictionaryIterator *iterator, void *context) {
  APP_LOG(APP_LOG_LEVEL_INFO, "Outbox send success");
}

/************************************ App *************************************/

static void select_click_handler(ClickRecognizerRef recognizer, void *context) {
  // Start voice dictation UI
  dictation_session_start(s_dictation_session);
}

static void click_config_provider(void *context) {
  window_single_click_subscribe(BUTTON_ID_SELECT, select_click_handler);
}

static void window_load(Window *window) {
  Layer *window_layer = window_get_root_layer(window);
  GRect bounds = layer_get_bounds(window_layer);

  s_output_layer = text_layer_create(GRect(bounds.origin.x, (bounds.size.h - 24) / 2, bounds.size.w, bounds.size.h));
  text_layer_set_text(s_output_layer, "Press Select to speak");
  text_layer_set_text_alignment(s_output_layer, GTextAlignmentCenter);
  layer_add_child(window_layer, text_layer_get_layer(s_output_layer));
}

static void window_unload(Window *window) {
  text_layer_destroy(s_output_layer);
}

static void init() {
  s_main_window = window_create();
  window_set_click_config_provider(s_main_window, click_config_provider);
  window_set_window_handlers(s_main_window, (WindowHandlers) {
    .load = window_load,
    .unload = window_unload,
  });
  
    // Register callbacks
  app_message_register_inbox_received(inbox_received_callback);
  app_message_register_inbox_dropped(inbox_dropped_callback);
  app_message_register_outbox_failed(outbox_failed_callback);
  app_message_register_outbox_sent(outbox_sent_callback);
  
  // Open AppMessage
  const int inbox_size = 128;
  const int outbox_size = 128;
  app_message_open(inbox_size, outbox_size);
  
  window_stack_push(s_main_window, true);

  // Create new dictation session
  s_dictation_session = dictation_session_create(sizeof(s_last_text), dictation_session_callback, NULL);
}

static void deinit() {
  // Free the last session data
  dictation_session_destroy(s_dictation_session);

  window_destroy(s_main_window);
}

int main() {
  init();
  app_event_loop();
  deinit();
}

And here is the javascript code that runs on the phone:

var xhrRequest = function (url, type, callback) {
  var xhr = new XMLHttpRequest();
  xhr.onload = function () {
    callback(this.responseText);
  };
  xhr.open(type, url);
  xhr.send();
};

// Listen for when an AppMessage is received
Pebble.addEventListener('appmessage',
  function(e) {
    // Get the dictionary from the message
    var dict = e.payload;

    console.log('Got message: ' + JSON.stringify(dict));
    
    var url = 'http://192.168.0.101:1880/exec?cmd=' + 
        encodeURIComponent(dict.COMMAND);
    
    xhrRequest(url, 'GET',
      function(response) {
        console.log('Response: ' + response); 
        
        // Assemble dictionary using our keys
        var dictionary = {
          'REPLY': response
       };

        // Send to Pebble
        Pebble.sendAppMessage(dictionary,
          function(e) {
            console.log('Response sent');
          },
          function(e) {
            console.log('Error sending response');
          }
        );

      });
  }                     
);
Posted in Home automation | Tagged , , | Leave a comment

Alexa on the Raspberry Pi

2016-06-15 16.43.38

UPDATE June 16th 2016: I was wrong about Alexa not being able to access my UK Amazon account. It appears that my UK an USA accounts are linked, so when I said “Read my Kindle”, Alexa started reading me my current Kindle book. It did it at about one sentence every few minutes, with no obvious way to stop it, so it was not that useful. I still don’t think it can access Amazon Prime music. 

Also, although the Alexa app is not available in the UK, you can go to alexa.amazon.com and control things from there. In particular, it shows me my history of interactions with Alexa.

A couple of things that the alexa web site showed me I could do were shopping lists and to-do lists. They are quite fun, but you have to go to the alexa web site to delete things from them.

It also reminded me that I could get a voice remote for my Amazon Fire stick, so I have ordered one of those. Perhaps at some time I can use it for voice control of my home automation.

I still could not get any smart home devices to work with my Alexa setup. When I tried “Discover devices” on the alexa web site, it did not discover my Wemo devices, although they are supported.  I suspect an Amazon Echo would find them. I wonder if this could be added to the Raspberry Pi application. It needs to do a UPnP Wifi search. It would be possible for either the Raspberry Pi or my Amazon Fire stick to do this.

SECOND UPDATE: The Alexa app is more useful than I thought it would be, now that I have looked at what it can do on alexa.amazon.com. It will now read and update my Google Calendar, and I have added several skills so it tells me about Beer, Cricket and a few other things. It will play a lot of radio stations via TuneIn, which does not need an account.

Unfortunately you can only set US addresses for devices (even Amazon Fire TV or sticks). This means I can’t default locations for things like weather. However, the traffic update does allow UK addresses. Amazon are going to have to do a lot of work on this to make it truly international.

I thought I would try the instructions on Github for Alexa on the Raspberry Pi.

My Kitchen Raspberry Pi, which is a Pi 3 with a Touch Display, and a camera, microphone and speaker, seemed a good choice. (I have Raspberry Pis in most of my rooms).

It took several hours to set up.

Here is is telling me a joke:

To use an Alexa with your own device, you have to set up a developer account using a USA Amazon account, and do a lot of configuration of your own custom device and security profile on the developer site. This results in a device type, and an oauth2 client id and secret, which you then use to configure the Raspberry Pi application.

The Raspberry Pi application is odd. It uses a node.js server and a Java client. The node.js server seems to only be used for the oauth2 authentication.

You have to install node.js, a recent version of the Oracle Java JDK, Maven, VLC, and a few other things. You need self-signed certificates to access the applications. It is all very involved, and the instructions are not very good. It is not at all clear why VLC is installed, particularly as it is configured, and then the configuration is discarded.

The main problem with the instructions is that they are for a very specific old version of Raspbian, and are misleading for the latest Jessie release of Raspbian.

The resulting application is a bit difficult to use and very fragile. It does not have much useful error reporting.

It looks like you need to re-authenticate the application every time you reboot the Raspberry Pi, and authentication is a non-trivial process.

This video explains some of the difficulties of the instructions and the application. The author of the video was setting the application up on a Pi Zero, which has its own issues:

Is the application useful for someone in the UK, who can’t yet officially buy an Amazon Echo? Well, not really.

Its OK for asking about the weather (which defaults to Seattle, if you are not specific), telling jokes, and asking some general knowledge questions. But is is currently pretty useless for playing music, and doing home automation.

There are several issues for UK users:

  • It is not linked to your UK Amazon account, so it can’t read your Kindle books, or play your Amazon music.
  • The Alexa application that configures it for home automation, music etc. is not available in the UK
  • It seems to use iHeartRadio for internet radio and that is not available in the UK.

When the Amazon Echo is eventually available in the UK, and other countries, some of these issues should be fixed. It might then  be worth developing a more robust application, which is easier to configure and use.


Posted in Home automation, Raspberry PI | Tagged , , , , | Leave a comment

Controlling my house with texts

2016-04-07 12.50.45

I backed the Seeedstudio RePhone Kickstarter, and got the Create kit. I thought I would use it as a house SMS server, so that I can control my house with text messages when I am out. I can already control it via various means including MQTT messages, if I have an Internet connection. But sometimes you do not have an Internet connection.

As the RePhone does not have Wifi, I needed to use Bluetooth to send the commands to my home automation system. This needs a Bluetooth SPP server, and a Raspberry Pi 3 seems like the perfect server for that, as it has built-in Bluetooth.

I am not sure it is a very good use of the RePhone as it does not use its capability to control electronics, but the RePhone is a relatively cheap way to get this capability.

I program the RePhone using Arduino. This involved bringing my old Vista laptop back to life, as the drivers for the RePhone are only available on Windows, and not on Windows 10. The good set of example provided made programming it to process texts, talk to a Bluetooth server and write to the OLED screen easy.

I programmed the Bluetooth SPP server in Java, and again there are good examples for that. Getting Bluecove working on the Raspberry Pi 3 was a little tricky but not too hard.

The Bluetooth SPP server relays the text message commands to my HouseControl server running on a Raspberry Pi 2, and sends the replies back to the RePhone which currently just displays them on the screen.

So now I can do things like turn the lights on or the heating up, or talk to people in the house via text to speech.

I do not currently text the replies back, but that would be easy to add.

Here is the RePhone Arduino code:

#include <LBT.h>
#include <LBTClient.h>
#include <LGSM.h>
#include <LCheckSIM.h>
#include <LDisplay.h>

// Change to the name of your server
#define SPP_SVR "pi3"

LBTDeviceInfo info;
char *spaces = "                    ";

void setup()  
{
  Serial.begin(9600);
  Serial.println("House Client started");
  
  // Set up the LCD screen
  Lcd.init();
  Lcd.font_init();
  Lcd.back_light_level(50);
  Lcd.screen_set(0xffff00); // Yellow background
  
  // Set up SMS
  while(!LSMS.ready())
  {
    delay(1000);
  }
  Serial.println("SMS is ready");
  
  // Set up Bluetooth
  bool found = false;
  bool success = LBTClient.begin();
  if( !success )
  {
    Serial.println("Cannot start Bluetooth");
	Lcd.draw_font(10, 0, "Cannot start Bluetooth", 0xffff00, 0);
    delay(0xffffffff);
  }
  else
  {
    Serial.println("Bluetooth client started");
    // Look for the Bluetooth devices
    int num = LBTClient.scan(30);
    Serial.printf("Found %d devices\n", num);
    for (int i = 0; i < num; i++)
    {
      memset(&info, 0, sizeof(info));
      // See if it is the required server
      if (!LBTClient.getDeviceInfo(i, &info)) continue;
      Serial.printf("Found address: %02x:%02x:%02x:%02x:%02x:%02x name: %s\n", 
          info.address.nap[1], info.address.nap[0], info.address.uap, info.address.lap[2], info.address.lap[1], info.address.lap[0],
          info.name);
      if (0 == strcmp(info.name, SPP_SVR))
      {
        found = true;
        Serial.println("Server found");
        break;
	  }
    }
  }
  
  if( !found )
  {
    Serial.println("Server not found");
	Lcd.draw_font(10, 0, "Server not found", 0xffff00, 0);
    delay(0xffffffff);
  }
  
  Serial.println("Trying to connect\n");
  // Try to connect
  bool conn_result = LBTClient.connect(info.address);
  Serial.printf("Connect result: %d\n", conn_result);
 
  if( !conn_result )
  {
    Serial.println("Connect failed");
    Lcd.draw_font(10, 0, "Connect failed", 0xffff00, 0);
    delay(0xffffffff);
  }
  else
  {
    Serial.println("Connected to SPP Server");
    Lcd.draw_font(10, 0, "Connected", 0xffff00, 0);
  }
}
 
void loop()
{
  // Wait for SMS message
  if( LSMS.available() ) 
  {
    char cmd[50];
    char reply[32];
          
    // Get the command from the text message 
    LSMS.remoteContent(cmd, 50);
    Serial.print("Command:");
    Serial.println(cmd);
    Lcd.draw_font(10, 20, spaces, 0xffff00, 0);
    Lcd.draw_font(10, 20, cmd, 0xffff00, 0);
	Lcd.draw_font(10, 40, spaces, 0xffff00, 0);
	
	// Send the command to the SPP server, terminated by newline
    LBTClient.write(cmd, strlen(cmd));
    LBTClient.write((char *) "\n", 1);

    // Read reply from SPP server
    while(true)
    {
      if(LBTClient.available())
      {
        int len = LBTClient.readBytes(reply,32);
		reply[len] = 0;
        break;
      }
      delay(100);
    }
    Serial.printf("Reply: %s\n", reply);
    Lcd.draw_font(10, 40, reply, 0xffff00, 0);
  }
}

and here is the Raspberry Pi 3 Java code:

package net.geekgrandad.apps;

import java.io.BufferedReader;
import java.io.IOException;
import java.io.InputStream;
import java.io.InputStreamReader;
import java.io.OutputStream;
import java.io.OutputStreamWriter;
import java.io.PrintWriter;
  
import java.net.Socket;
import java.net.UnknownHostException;

import javax.bluetooth.*;
import javax.microedition.io.*;
  
/**
* Class that implements an SPP Server which accepts single line of
* message from an SPP client and sends a single line of response to the client.
*/
public class SPPServer {
    
    //start server
    private void startServer() throws IOException{
  
        //Create a UUID for SPP
        UUID uuid = new UUID("1101", true);
        //Create the servicve url
        String connectionString = "btspp://localhost:" + uuid +";name=Sample SPP Server";
        
        //open server url
        StreamConnectionNotifier streamConnNotifier = (StreamConnectionNotifier)Connector.open( connectionString );
        
        //Wait for client connection
        System.out.println("\nServer Started. Waiting for clients to connect...");
        StreamConnection connection=streamConnNotifier.acceptAndOpen();
  
        RemoteDevice dev = RemoteDevice.getRemoteDevice(connection);
        System.out.println("Remote device address: "+dev.getBluetoothAddress());
        System.out.println("Remote device name: "+dev.getFriendlyName(true));
        
        //read string from spp client
        InputStream inStream=connection.openInputStream();
        BufferedReader bReader=new BufferedReader(new InputStreamReader(inStream));
        
        OutputStream outStream=connection.openOutputStream();
        PrintWriter pWriter=new PrintWriter(new OutputStreamWriter(outStream));
        boolean connected = true;
        
        while (connected) {
	        String lineRead=bReader.readLine();
	        System.out.println(lineRead);
	        Socket sock = null;
	        String host = "192.168.0.100";
	        String ret = "No reply";
	        
			try {
				sock = new Socket(host, 50000);
			    PrintWriter out = new PrintWriter(sock.getOutputStream(),true);
			    BufferedReader in = new BufferedReader(new InputStreamReader(sock.getInputStream()));
			    out.println(lineRead);
			    ret = in.readLine();
			    System.out.println("Reply is " + ret);
			    out.close();
			    in.close();
			    sock.close();
			    sock = null;
			} catch (UnknownHostException e1) {
				System.err.println("Unknown host");
				connected = false;
			} catch (IOException e1) {
				connected = false;
				System.err.println(e1);
				try {
					if (sock != null) sock.close();
				} catch (IOException e2) {
				}
			}
        
	        //send response to spp client
	
	        pWriter.write(ret);
	        pWriter.flush();
        }
	  
        pWriter.close();
        streamConnNotifier.close();
  
    }
  
  
    public static void main(String[] args) throws IOException {
        
        //display local device address and name
        LocalDevice localDevice = LocalDevice.getLocalDevice();
        System.out.println("Address: "+localDevice.getBluetoothAddress());
        System.out.println("Name: "+localDevice.getFriendlyName());
        
        SPPServer sampleSPPServer=new SPPServer();
        sampleSPPServer.startServer();
        
    }
}
Posted in Arduino, Home automation, Raspberry PI | Tagged , | Leave a comment

VGA and audio for Pi Zero

2016-03-26 11.56.06

I backed the Analog Expander Cap – for Raspberry Pi Zero Kickstarter campaign.

It was a lot of soldering, but it works and makes a very small PC that works with a VGA monitor.

I have only tried the VGA ad audio, not the composite output.


Posted in Electronics, Raspberry PI | Leave a comment